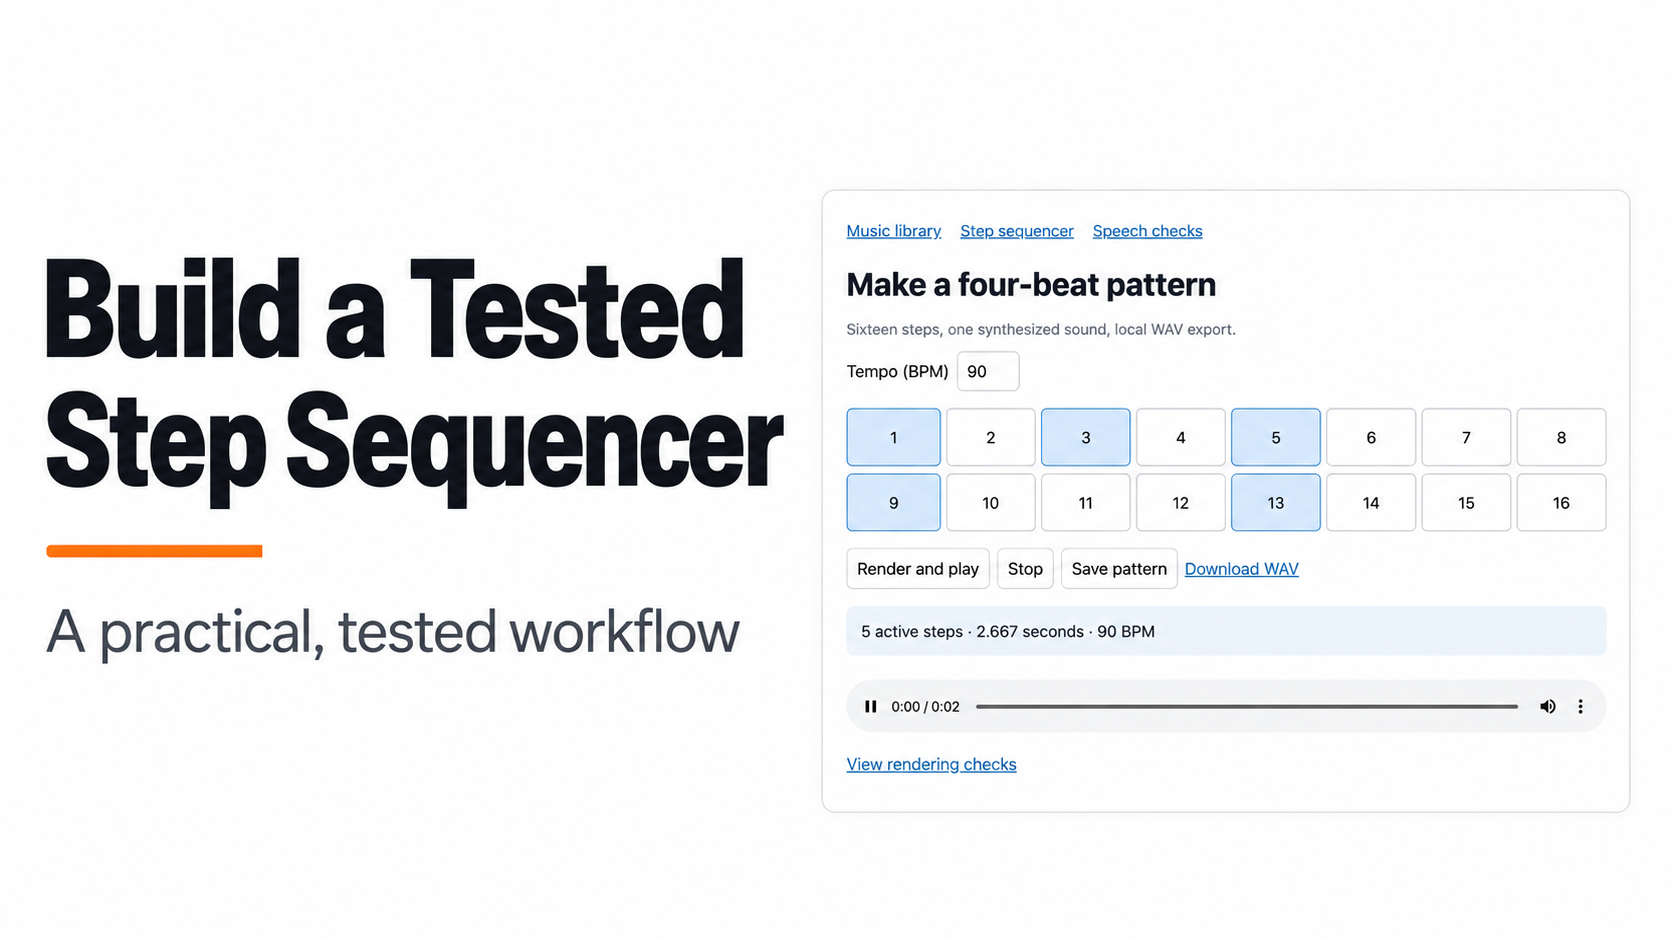
Build one reliable musical loop before adding a piano roll, mixer or arrangement timeline. A sixteen-step sequencer gives you a small result you can measure: selected steps become sound events, the tempo determines their spacing, and the export contains the expected number of audio samples.
We rendered a four-hit pattern at two tempi and checked the resulting PCM audio. At 120 BPM, the loop contains 32,000 frames and lasts two seconds. At 90 BPM, it contains 42,667 frames and lasts approximately 2.667 seconds. Both outputs contain sound without reaching the clipping limit.
The example uses one synthesized pulse sound and a fixed four-beat loop. It does not test instrument plugins, multitrack mixing, live recording or a complete music-production workflow.
Follow the steps
- 1. Define the pattern before drawing the interface
- 2. Render two tempi and measure the files
- 3. Check playback, saved state and export
Download the tested workflow kit. From its audio folder, serve the files locally:
python3 -m http.server 4401 --bind 127.0.0.1Open http://127.0.0.1:4401/index.html?mode=sequencer. The application runs in the browser and creates a WAV download from the selected steps. Its sound is generated locally; it does not need a sample library or an external catalog.
1. Define the pattern before drawing the interface
For this exercise, a bar has four beats and each beat has four subdivisions. That produces sixteen steps. Activate steps 1, 5, 9 and 13 to place one sound on each beat.
The timing rules are small enough to write down before implementation:
Seconds per beat = 60 / BPM
Seconds per step = 60 / BPM / 4
Four-beat loop duration = 4 × 60 / BPM
At 120 BPM, each beat lasts half a second and each step lasts one eighth of a second. The four selected events begin at 0, 0.5, 1 and 1.5 seconds. The loop ends at two seconds.
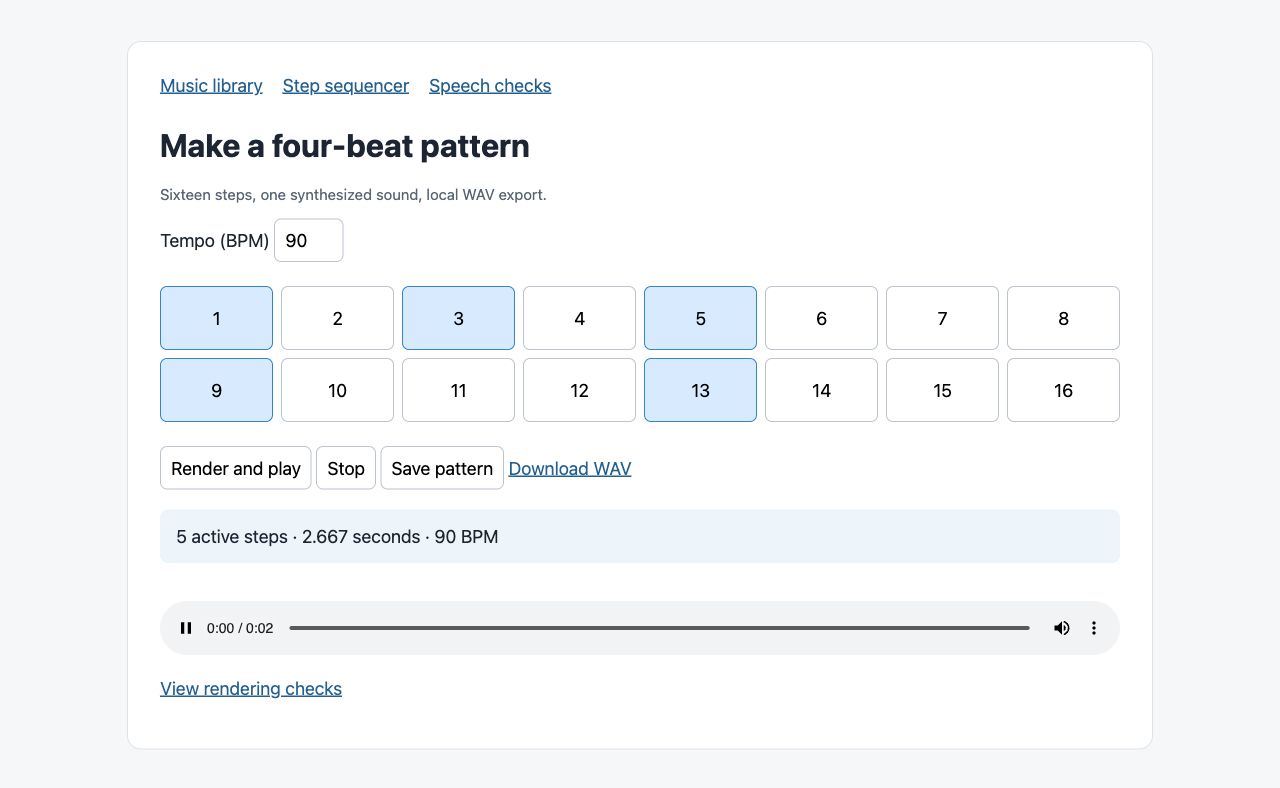
Keep the project state separate from the rendered audio. The project needs a tempo and a list of selected step numbers. The audio contains samples derived from those choices. Saving the samples alone would not preserve an editable pattern.
When using REA to investigate a similar feature, make this distinction part of the question. Ask where the active pattern is stored, how its positions become time values, and which action produces audio. Do not assume a visible grid reveals the scheduler or export format. The scoped prompt guide shows how to ask for evidence without expanding to an entire application.
For the controlled example, we chose a tempo range of 40–240 BPM and reject steps outside the sixteen-step pattern. These are explicit design decisions, not recovered limits of another application.
We also ran REA 6.8.0 against the delivered application files: three relevant files, two parsed JavaScript files and zero parse failures. The complete analysis is retained in the kit. It is static inspection, not a playback result. To repeat from the audio folder:
rea analyze-javascript-application "$PWD/artifact" --format json2. Render two tempi and measure the files
Press Render and play at 120 BPM. The app creates mono PCM audio at 16,000 samples per second, exposes a download link and attempts playback. Change the tempo to 90 BPM and render again.
Changing the tempo should change timing while preserving which steps are active. If you only change the displayed number, the grid can look correct while the exported audio remains unchanged.
We checked the renderer independently in two implementations. A Python function generated reference PCM files. The JavaScript function used by the browser produced byte-for-byte identical WAV files for both selected tempi.
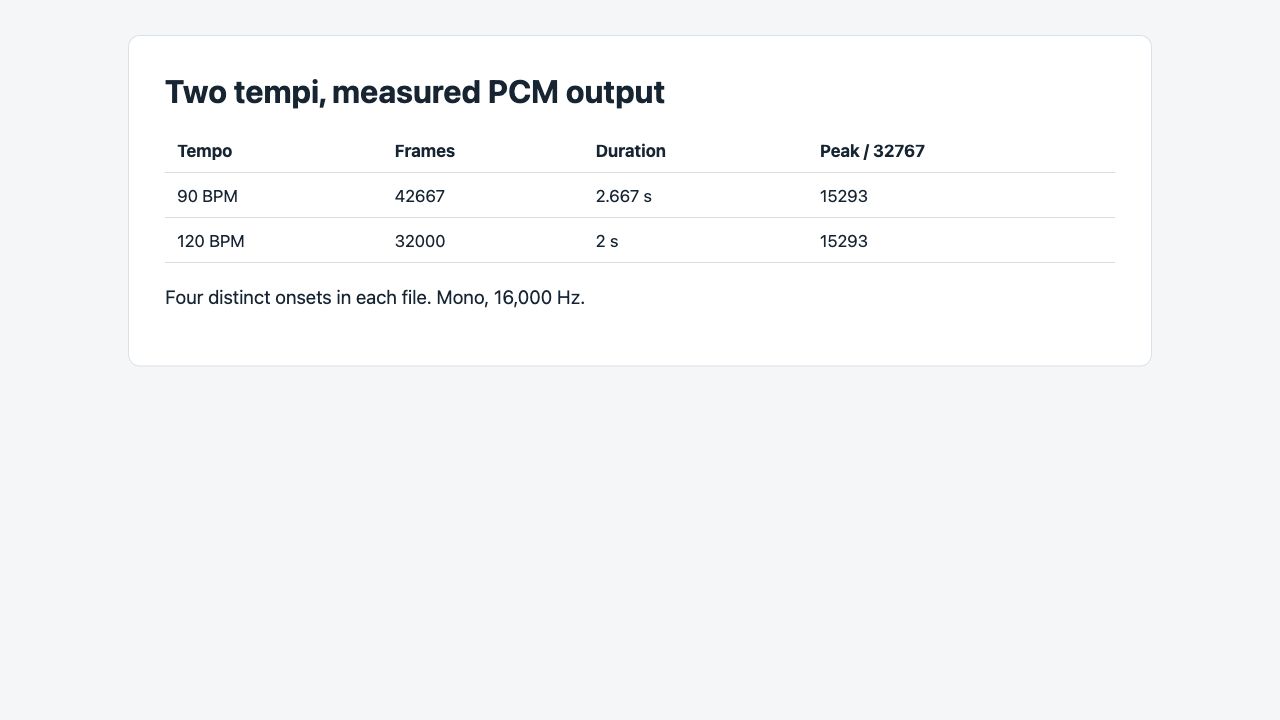
| Property | 120 BPM | 90 BPM |
|---|---|---|
| Sample rate | 16,000 Hz | 16,000 Hz |
| Output frames | 32,000 | 42,667 |
| Loop duration | 2.000 seconds | 2.667 seconds |
| Active events | Four | Four |
| Channels | One | One |
The noninteger frame count at 90 BPM is rounded to the nearest sample. That is a measurable sampling detail, not evidence of a timing bug by itself. Compare expected frame positions with a tolerance appropriate to the sample rate.
Run the shared-module checks with:
node test.mjsThey verify duration, silence, invalid inputs, WAV header size and agreement with the independently generated files. The retained JSON results distinguish these checks from browser playback.
A larger sequencer needs a different timing review. Adding sounds can make samples exceed the allowed range. A live scheduler can drift even when an offline render is correct. This example avoids those extra claims by rendering the complete small loop before playing it.
3. Check playback, saved state and export
An export that passes structural checks still needs to be opened and played. Use the app’s player to start, pause and replay the rendered loop. Press Stop to return to its beginning.
Then change the active pattern. Turn off one selected step, render again and check that the event disappears. Save the pattern, reload the page and confirm the selected steps and tempo return. Browser storage is tied to the page’s origin, so keep the same local host and port during that test.
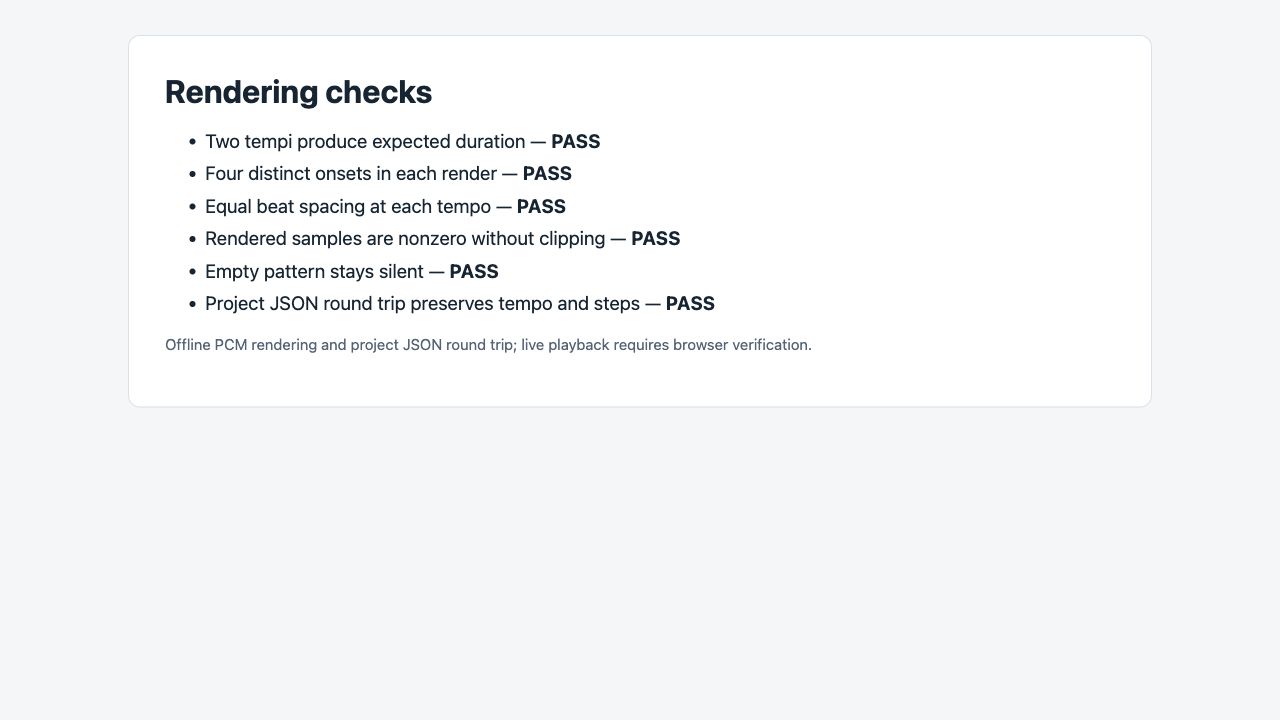
Our retained checks establish:
- Expected output duration at both selected tempi.
- Four distinct event positions with the expected beat spacing.
- Nonzero audio samples below the clipping limit.
- An entirely silent buffer for an empty pattern.
- A project JSON round trip that preserves tempo and active steps.
- Agreement between the browser’s rendering function and the independent PCM files.
Our first browser persistence check exposed a real defect: the selected step survived, but an edited tempo reverted from 90 to 120 BPM. Save and Render were reading a cached event value. We changed both actions to read the visible tempo field directly. Three handler-level regression checks now pass, including an edit without a change event. The browser retest then passed: after saving and reloading, the tempo remained 90 BPM and Step 3 stayed selected. Rendering that saved pattern reported five active steps and 2.667 seconds at 90 BPM. This establishes the checked interface state and rendered duration, not device audibility.
node test-ui-state.mjsA JSON round trip is not the same as a browser reload. The first checks data serialization; the second checks the application’s storage integration. Keep both in your acceptance checklist.
For the export, check the downloaded file rather than trusting the button label. Confirm it has a WAV header, the expected sample rate and payload length, then open it in a player. A useful regression check is to retain a file hash for a fixed pattern so an unexpected renderer change becomes visible.
If a failure appears, correct the smallest broken layer. Wrong duration points toward tempo conversion or frame rounding. Correct duration with silence points toward event placement or sound generation. Correct audio with the wrong saved pattern points toward state handling. This separation prevents a broad “fix the sequencer” prompt from changing parts that already work.
You now have a measured single-loop foundation. Add another sound, velocity or an arrangement view only after writing the new acceptance criteria. The verification guide can help connect each new requirement to the observation or test that supports it.